This is the easiest and most reliable way to buy a transit card. You can do it from home before you leave and use a credit card,* even if it’s not issued by a Japanese bank.

*Important note: For various arcane reasons, VISA credit/debit cards issued by foreign banks are not accepted. MasterCard and AmEx work fine, so be sure to switch your default card to one of those before trying to buy a transit card on your phone or topping up the cash on it. Also, if it’s not letting you add cash with your MasterCard/AmEx, go to the clock app and check your World Clock to make sure you’re doing it during Tokyo business hours. Sometimes it doesn’t go through if you’re trying to do it in the middle of the night BECAUSE JAPAN (>_<;;)
Here’s how to add a Suica “Welcome” card to your iPhone
(sorry, no Android app yet)

These “Welcome” cards are for visitors only. They don’t require a ¥500 deposit and can only be reloaded for 180 days after date of purchase). How to get the app and use it on your iPhone.
Here’s how to add a regular Suica/PASMO card for iPhone:

Go into your Apple Wallet/Google Pay and click on the “add card”

Click on the “transit card” category

Go into your Apple Wallet/Google Pay and search for “Suica” or “Pasmo”

When you see this screen, click “continue”
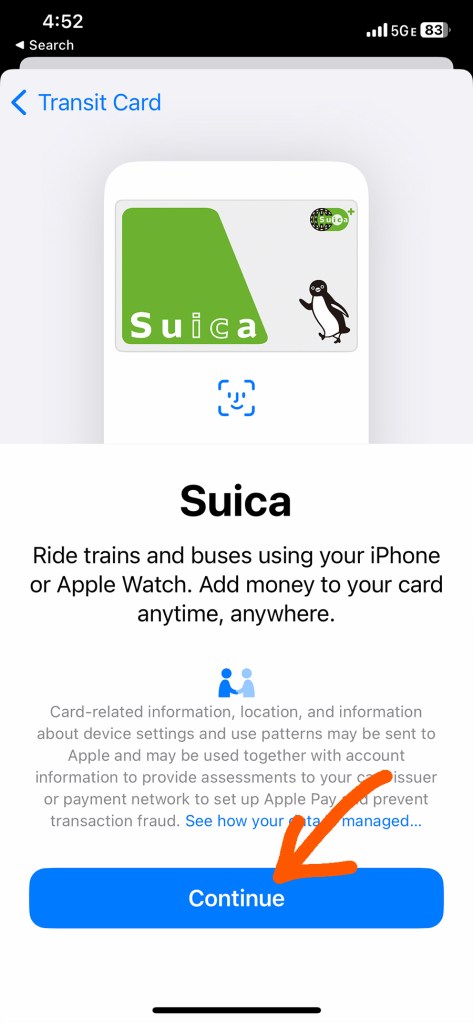
Agree to the conditions

Choose how much money to put on your card and click on that amount.
You can’t get a refund for unused value, but if you’re going to be in Tokyo for more than one day, ¥1000 is not enough to get you very far, especially if you’re using it to get from Haneda airport to your hotel.
My rule of thumb is ¥1200 per day of sightseeing, but your mileage may vary.

Your default payment method will come up. If you want to change that, return to the wallet screen and add a card or change your default.

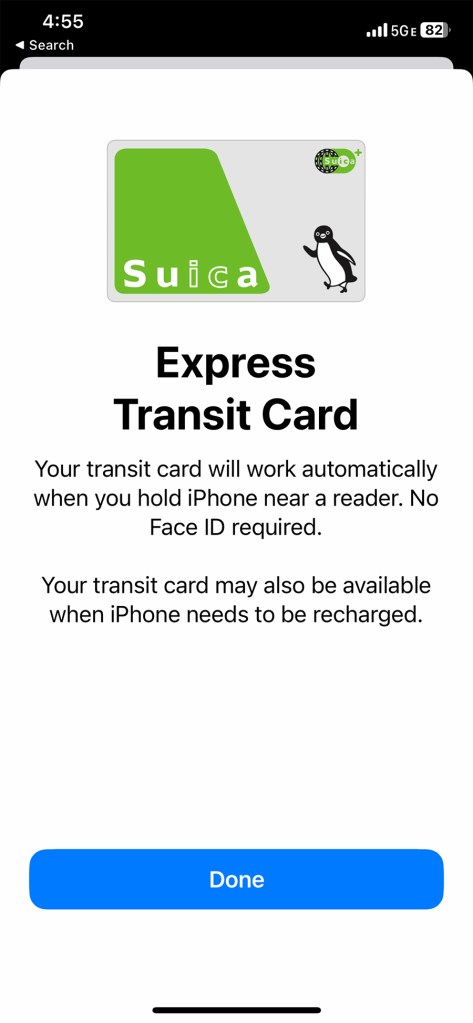
This is what success looks like!
When you’re ready to add more money to your card, just click on the card in your wallet and add money from your default credit/debit card (be sure your default is not a VISA card)

To use your card, hover your phone close to the sensor to the right of the ticket gate when entering or exiting a train platform. It will make a little ding when it connects. (Don’t touch it to the pad, just bring it face to face). The app does not have to be open and it still works if your phone is dead or turned off.
How your transit card works:
You are charged according to how far you travel, so you tap your card at the ticket gate when you enter and exit the system.
• Hold it over the sensor on the front of the ticket gate to the right that says “Suica” or “Pasmo” (both cards work everywhere) and when you hear the beep, walk through. This works even if your phone is off.
• Choose the platform that will take you to your destination. (Your phone navigation app should tell you the name of the station that is the last stop in the direction you’re going). Above the stairs leading to the platform or somewhere near the end of the platform stairs will be a map of the subway stops serviced by the trains that stop at that platform. If you don’t see your destination on the map, cross over to the platform on the other side of the tracks.
• When you exit at your destination, hold your phone over on the sensor at the ticket gate until it beeps and it will let you through, automatically debiting the proper amount.
How to tell how much money is left on your card:
After you tap your card on any sensor as you enter or exit a station, check the lighted display on the right side of the ticket gate as you walk through. The amount left on your card will be displayed.
What if there isn’t enough money left on my card to exit?
If this happens, a loud noise will sound, the sensor will flash red, and the gate will snap closed in front of you.
If it does do not try to barge through, because the next time you try to use your card, it will happen again and you won’t be able to enter the ticket gate. Instead, back up and step aside to add more money to the card on your phone. If you can’t do that because you are depending on wifi instead of cellular data, go to the booth at the end of the ticket gate and the station staff will ask you where you got on and let you pay in cash. The next time you want to use the card on your phone, though, you’ll have to go to the booth before entering the ticket gate and have them fix it so it doesn’t set off the alarm and bar your entrance.
And unless you really want to ruin your day…once you put a transit card in your Apple Wallet, DO NOT turn off your passcode/face recognition or it will be deleted, along with all the money you loaded onto it! (Not that we know anyone who did this… 🫠 )
How to figure out where you’re going
You could do it the old-fashioned way by carrying a paper map or consulting the map on the wall at the station, but by far the fastest and easiest way is to use a phone app.

*The JR Line also runs long distance trains like the “bullet train,” but you’ can’t ride those trains with transit card. Here’s how to get a ticket for those trains.
Get more Japanese goodness straight from the source!
Subscribe to my monthly Japanagram e-magazine・° ♪・☆ It’s free!


Japanese Home Cooking recipes • Beyond Tokyo travel destinations • Seasonal Secret shopping & events • The Thing I Learned Today • Why, Japan, Why? • Monthly book or J-swag giveaway
•

Jonelle Patrick writes novels set in Japan, produces the monthly e-magazine Japanagram, and blogs at Only In Japan and The Tokyo Guide I Wish I’d Had
